Thursday 22 September 2011

Jointed Damsel Nymph ( JDN )

Jointed Damsel Nymph ( JDN )

This is a very simple jointed nymph pattern that use very minimum material and simple steps

The Materials:

Hook - TMC 2488 size 10
Abdomen - Wire frame with Ostrich Palm fiber
Thorax and Legs - Pheasant Tail fiber
Eye - Burn mono eye
Belly and body - Lead wire and Peacock Herl fiber

The step by step tying instruction

Bend a hard wire about 15mm

Tie down the wire and create a frame with taper

Cut 3 pcs of Ostrich Palm fiber ( Olive, brown or Gray colour ), tie down to end of the wire frame

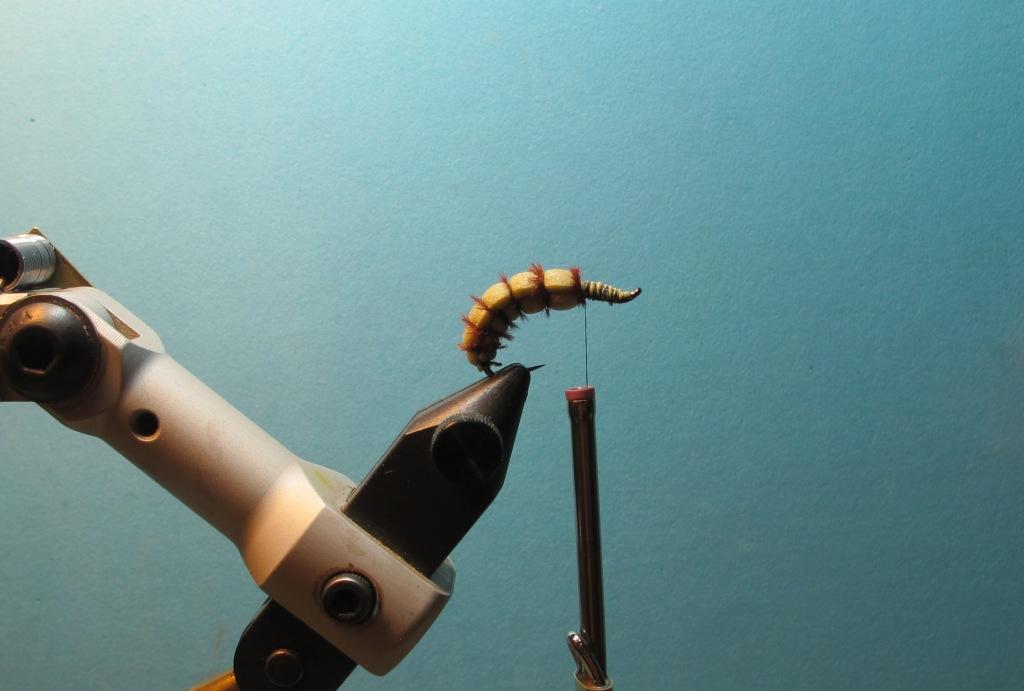
Roll the fiber to the thread

Spin the fibers around the wire frame, tie down and trim balance of the fibers

Roll the lead to the hook and tie down, cover with thread

Attach the abdomen to the hook with a mono line

Tie in another Ostrich Palm fiber and spin at the joining

Tie in about 8 pcs of Pheasant Tail fibers at both side of the body

Tie in another 3 pcs of Peacock herl fiber

Spin the Peacock fiber fiber to the body, use the fiber to split the legs, tie down the fiber tight, do not cut the balance

Fold over the Pheasant Tail fiber to create the thorax, tie in the mono eye

Fold again the Pheasant tail fiber cover the mono eye and tie down, trim the fiber and keep about 3-4mm extra. Spin the balance Peacock Herl fibers around the neck and tie down, whip finish.

Drop 2 small drop of black Loon Hard Head to the mono eye.

The JDN is complete....

Good Luck and tight line...

Sunday 11 September 2011

Foamular of Foam Caddis Pupae

Foam Caddis Pupae 
Material:

Abdomen - 2mm thick close cell foam
Abdomen hair - Ostrich Palm fiber
Leg and Wing Case - Pheasant Tail fiber
Thorax - 2mm thick close cell foam
Head and eye - foam eye profile with Loon Hard Head
Belly - Dubbing
Lead and markers

Step by step tying instructions:

Put in a 2cm length of lead wire

Hook through the foam and tie in the Ostrich Palm fiber

Tie down the lower portion of foam

Tie down the top portion of foam together with the Ostrich Palm fiber

Tie down the foam tight after complete the top portion of foam

Tie in about 8 pcs of Pheasant tail fiber at both side

Tie in another pcs of foam for the thorax

dub in some dubbing to fold the legs backward, fold the Pheasant Tail fiber and tie down

Fold down the foam and tie down tight

Bring a pair of Pheasant tail fiber through the foam and tie down

Fold over the foam to form the head, tie in figure 8 to form the eye profile

Trim the foam. Tie in another Ostrich Palm fiber at the neck and roll over 3 times, tie down the fiber

Colour the fly with desire markers.

Foam Caddis Pupae is ready


Tuesday 6 September 2011

Foamular of Foam Wasp

Foam Wasp


This is a simple foam pattern imitate the Wasps. A terrestrial pattern for freshwater. The tying method are combine technique of foam hopper and Cicada X.

Material:

Abdomen - 2mm thick foam
Hook - TMC 2312 size 8 - 12
Wings - Vinyl raffia coat with soft cement
Legs - Rubber legs
Thorax and head - 2mm thick foam
Belly and neck - Ostrich palm fiber
Antenna - 1 pair of Pheasant Tail fiber
Black marker

The step by step tying instructions:

Cut a piece of foam and hook through the center

Tie in the foam lining to taper the body

Tie down the abdomen in segment

Tie in another foam for the thorax and cut the both side

Tie in another foam half of the width of the thorax, Tie in 2 Ostrich Palm fiber

Tie in the Vinyl Raffia wings

Tie down the side foam and fold over the smaller foam, tie down and trim the foam

Tie in the rubber legs

Fold over the foam, tie down to create the thorax

Fold the foam through the hook eye similar to Hopper pattern technique. Use needle to bring a pair of Pheasant Tail fiber as the antenna

Fold over the foam and create the head. Now the Wasp is ready for colouring

Colour the Wasp with fine head black marker.

This is what fish will see

Friday 2 September 2011

Foam Caddis Pupae

Foam Caddis Pupae


Caddis Pupae / Pupa pattern is widely tie by fly tier around the world, in Soft Hackle Wet Fly, Sparkle Pupa and Emergent Sparkle Pupa pattern.. They are mostly dead drift on the surface or in the bottom.

The pupal stage of the caddis is feed selectively by trout during the hatches, this is the phase where the caddis emerges to the surface, leaving from their cocoon hidden, armored and absolute still, safe from the trout. they are widely spread in most lakes, ponds, creeks, streams, rivers, stagnant swamps and even roadside ditches... some say, if the water hold trout, it has caddis.

I am tying this pattern in 2 version, 1 with full foam and the other one with lead lining... where the full foam version float beautifully just beneath the surface, the lead version sink slowly. It's tie on a wide gap hook size 10, but the ideal size should be 12-16.


When the caddis pupae reach the surface, they will quickly break out from the shelf.. emerge as a Caddisfly..

Emerging Caddis